7.1 Calibration of seed
To access calibration, select Settings/Calibration/Seed

Figure 1. Calibration menu, seed
Select calibration method. Enter seed rate (number of seeds per seeded area) in the upper field or seed spacing (spacing between plants) in the lower field. The selected calibration method is displayed in the operations menu.
Desired singulator position. The desired singulator position is specified within the range of 0 to 20 or "Auto".
The end values (0 and 20) represent the end positions of the sigulator knob
If the desired singulator position is set to “Auto”, the singulator dial will automatically move its position between 0 and 20 depending on the number of skips and doubles measured.
Enter the number of holes on the seed disc installed in the metering unit. If the disc contains more than 70 holes, deviations from the specified feed rate are measured in percentages instead of in skips/doubles.
Open calibration view for calibration of one row
Open custom edit view where individual settings per row can be set.
The desired and measured singulator position is only available for machines with an electrical singulator installed and activated.
To choose the seed disc and settings for the metering unit, refer to the chapter “Drilling Recommendations” in the machine manual.
Calibration
Values are displayed either in metric or imperial units, depending on which one has been selected in the general settings menu.

Figure 2.
Air pressure (kPa)
Measured singulator position. Specified in the range 0 to 20.
Amount of seed
Number of skips
Number of doubles
Start calibration
Calibration speed. If the expected driving speed is, for example, 12 km/h, the calibration must be set for a speed of 12 km/h.
Select which of the row units to be calibrated (i.e. the row that has a calibration bag).
Seed rate or seed spacing (depending on calibration method).
Output quality
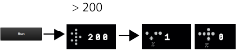
Figure 3.
The calibration is normally done on one seed feed housing unit and the values are automatically transferred over to the others. If desired, it is also possible to calibrate each seed meter individually
Check that there is seed in the seed hopper; the depth of seed should be at least 15 cm.
Place a calibration bag under the feed for the seed meter that is to be calibrated.
Start the fan; the value is displayed in field (F); see Figure 2. Check that the air pressure is correct (3.5 kPa) in the seed metering unit.
Enter the values in the calibration menu.
Start the calibration using the (K) button; see Figure 2 and hold it in until the indicated amount of seed fed out is at least 200
Read the proportion of skips
 and doubles
  . If any value is too high, adjust the
singulator.
. If any value is too high, adjust the
singulator.To reduce the proportion of doubles, reduce the singulator dial’s set value.
To reduce the proportion of skips, increase the singulator dial’s set value.
Repeat points 4 to 5 until the required accuracy has been achieved
When the machine is equipped with a seed disc with more than 70 holes, read the percentage deviation from the application rate in the output quality field (O); see Figure 2 and adjust the singulator dial’s set value to minimise the deviation.
For a machine with electric singulation, change the value of the desired singulator position, in order to achieve a better result with fewer skips/doubles. The same applies as for manual adjustment, i.e. if there are many skips, enter a higher value for the singulator position (B); see Figure 1, and if there are many doubles, add a lower value for the desired singulator position (B).
Exit the calibration menu using
 , or go directly to calibration of another
unit
, or go directly to calibration of another
unitRemove the calibration bag and pour the seed back into the hopper.
Custom edit

Figure 4. Custom edit menu
In this view, individual settings per row unit can be set for seed rate or spacing, number of holes in seed disk and singulator position.
If individual settings have been applied, these can be reset by entering values in the fields Apply To All,or updating the desired setting in the main calibration view, see Figure 1.