7.4.2 Calibration
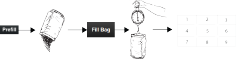
Figure 1.
The calibration is normally carried out on one feed unit and the values are automatically carried over to the others. If desired, it is also possible to calibrate single feed units individually.
Before calibration, check that there is a sufficient amount of micro-granulate in the micro-granulate hopper. There should be micro-granulate to a minimum depth of 15 cm in the hopper.
Set the feed units and select a feed roller so that it suits the actual micro-granulate type.
Enter the values in the calibration menu.
Fill the output system using the (E) button.
Empty the calibration bag and put it back in place.
Select the calibration button (G) and hold it in until the right amount of micro-granulate has been fed into the calibration bag. The pulses from the feed are displayed alongside the pulse symbol.
Weigh the contents of the calibration bag. Tip: First reset the scales with an empty calibration bag.
Enter the weight of the calibration bag contents in field (D) in the calibration menu. The number of pulses per kg will automatically be displayed in field (F). To enter the number of pulses manually, press field (F) and specify the number of pulses in the pop-up window. To cancel the calibration and perform a fresh calibration, repeat points 3 to 7.
CAUTIONThe calibration result becomes the baseline value. Always check the actual feed rate on the field. If necessary correct the pulses/kg. Example: If the feed rate is actually 10% too little, increase the pulses/kg by 10%. Note the fertiliser pulses/kg and the actual feed rate for future use.
You can exit the calibration menu using
 , or go directly to calibration of another
unit.
, or go directly to calibration of another
unit.
Before drilling, ensure that the same type of feed roller is fitted to all feed units.
Perform a new feed check in the field after drilling about a hectare.
Check regularly that deposits have not built up on the seed rollers and in the feed units.